Sending repetitive monthly invoices, individual performance reports, or automated updates to multiple clients manually takes hours. Using Excel VBA to integrate directly with Microsoft Outlook allows you to send customized emails with dedicated file attachments in just seconds.
In this step-by-step guide, you will learn how to set up a clean, reliable VBA macro that reads recipient email addresses, custom subjects, body text, and specific attachment file paths directly from your Excel sheet.
Why Automate Outlook Emails via Excel VBA?
Automating your email dispatch directly from your workbook offers immediate workflow advantages:
- Batch Dispatching: Send personalized emails to dozens of recipients with a single click.
- Dynamic Attachments: Attach individualized PDF reports or statements dynamically per row.
- Draft Review Mode: Choose between displaying emails for manual review or sending them out instantly.
Step 1: Set Up Your Worksheet Layout
Before adding the macro, ensure your active worksheet has headers in Row 1 matching the structure below:
- Column A: Recipient Email Address (e.g.,
client@example.com) - Column B: Email Subject Line
- Column C: Personal Salutation / Name
- Column D: Full Path to File Attachment (e.g.,
C:\Reports\Invoice_101.pdf)
Step 2: Copy and Paste the Email VBA Code
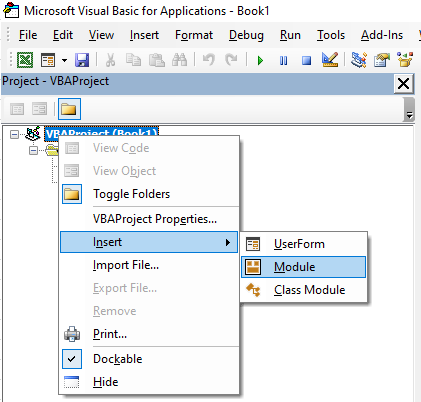
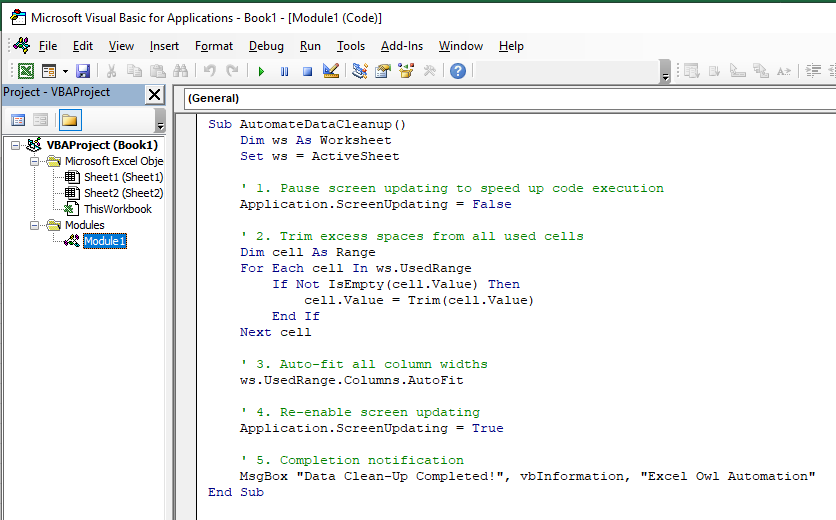
Press Alt + F11 to open the Visual Basic Editor, click Insert ➔ Module, and paste the code below:
Sub SendAutomatedEmailsWithAttachments()
    Dim OutlookApp As Object
    Dim OutlookMail As Object
    Dim ws As Worksheet
    Dim lastRow As Long
    Dim i As Long
    Dim emailTo As String
    Dim emailSubject As String
    Dim clientName As String
    Dim attachmentPath As String
    Dim mailBody As String

    Set ws = ActiveSheet
    lastRow = ws.Cells(ws.Rows.Count, "A").End(xlUp).Row

    If lastRow < 2 Then
        MsgBox "No email data found starting in Row 2!", vbExclamation, "Excel Owl Automation"
        Exit Sub
    End If

    ' Initialize Outlook Application instance
    On Error Resume Next
    Set OutlookApp = GetObject(, "Outlook.Application")
    If OutlookApp Is Nothing Then
        Set OutlookApp = CreateObject("Outlook.Application")
    End If
    On Error GoTo 0

    Application.ScreenUpdating = False

    ' Loop through each row in worksheet
    For i = 2 To lastRow
        emailTo = ws.Cells(i, 1).Value
        emailSubject = ws.Cells(i, 2).Value
        clientName = ws.Cells(i, 3).Value
        attachmentPath = ws.Cells(i, 4).Value

        If emailTo <> "" Then
            Set OutlookMail = OutlookApp.CreateItem(0)

            ' Construct HTML Email Body
            mailBody = "<p>Dear " & clientName & ",</p>" & _
                       "<p>Please find attached your requested report.</p>" & _
                       "<p>Best regards,<br><strong>Excel Owl Automation Team</strong></p>"

            With OutlookMail
                .To = emailTo
                .Subject = emailSubject
                .HTMLBody = mailBody

                ' Attach file if valid file path exists
                If attachmentPath <> "" And Dir(attachmentPath) <> "" Then
                    .Attachments.Add attachmentPath
                End If

                ' Change to .Send to dispatch emails instantly without preview
                .Display
            End With
        End If
    Next i

    Application.ScreenUpdating = True

    MsgBox "All emails processed successfully!", vbInformation, "Excel Owl Automation"
End Sub
Step 3: Run and Preview Your Emails
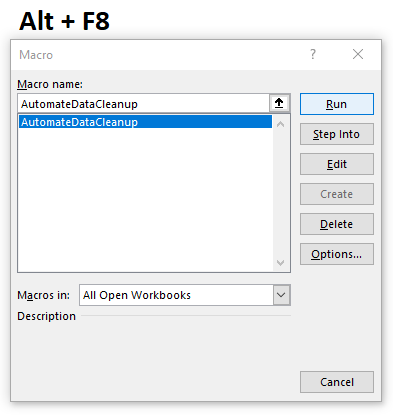
Return to Excel, press Alt + F8, select SendAutomatedEmailsWithAttachments, and click Run. The macro will create customized Outlook email windows with attached files ready for inspection!
💡 Pro Tip: Switch from Preview to Direct Send
By default, this script uses.Displayso you can review emails before sending. Once you verify your workflow, change line 52 from.Displayto.Sendto dispatch all emails in the background automatically.
Step 4: Save File as .xlsm
Remember to save your Excel file as an Excel Macro-Enabled Workbook (*.xlsm) to preserve your VBA automation.